How to use the Webmail's Address Book
This guide will show you how to use our Webmail's address book.
Quick links:
- Open Webmail
- Log on to Webmail
- View your inbox
- Open the Address Book
- Adding a Contact
- Browsing your Address Book
- Sending an Email to a Contact
- Editing a Contact
- Deleting a Contact
- Searching for a Contact
Step 1: Start Your Web Browser
Start your web browser, the way you normally do when you are going to browse the web to visit a website. If you have to dial up in order to connect, do that now. In the following example, we are using Internet Explorer on a PC. Most other browsers will be very similar.
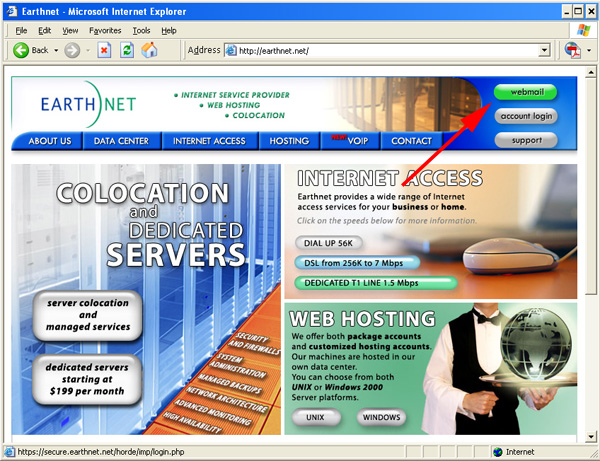
Step 2: Go To the Webmail web page: webmail.earthnet.net
Near the top of the window, at the Address bar, type in webmail.earthnet.net and hit enter. This will bring up the webmail log-in screen, shown in step 3.
Alternately, you can go to our website, www.earthnet.net, then click on the webmail button in the upper right-hand corner of the page:
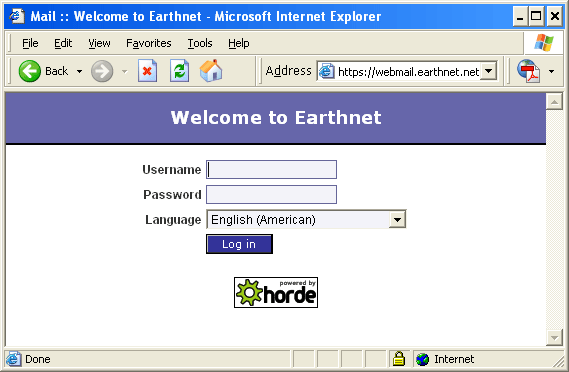
Step 3: Log In
A page will load, titled Welcome to Webmail. Type in your username and password, then click the Log in button.
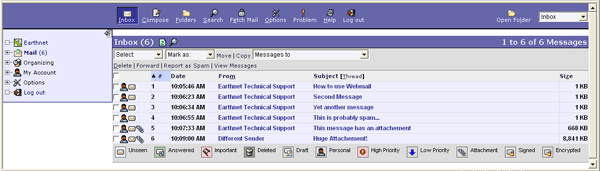
Step 4: View your Inbox
After you log in, your screen will look similar to the picture below. There is a row of icons along the top (INBOX, Compose, Folders, etc). Below that, you will have a list of all of your messages. It will show the Date when the message was sent, who it is From, the Subject of the message, and the Size of the message.
Note: if you're logging in for the time to webmail, you might not see the left panel (as circled on the pitcure below). If that is the case, simply log out of webmail by clicking on the Log Out button in the upper right-hand corner, and then repeat steps 3 and 4.
IF YOU STILL CANNOT SEE THE LEFT PANEL, CLICK ON THE LITTLE GREEN ARROW POINTING RIGHT (the one circled in red below), which will reveal the left panel:
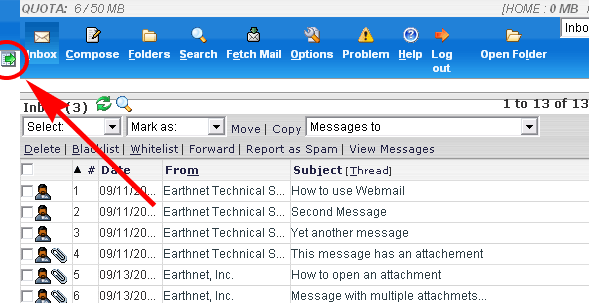
You should now be able to see the left panel circled below.

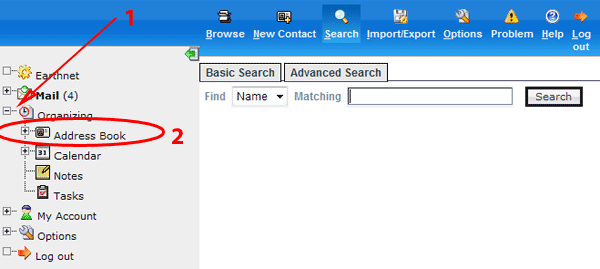
Step 5: Go to the Address Book Section
To access your address book, click on the + sign next to the Organizing category (as indicated by the arrow number 1), to reveal the link to the Address Book Section (circled in red, number 2).
Click on the Address Book link (circled in red, number 2).
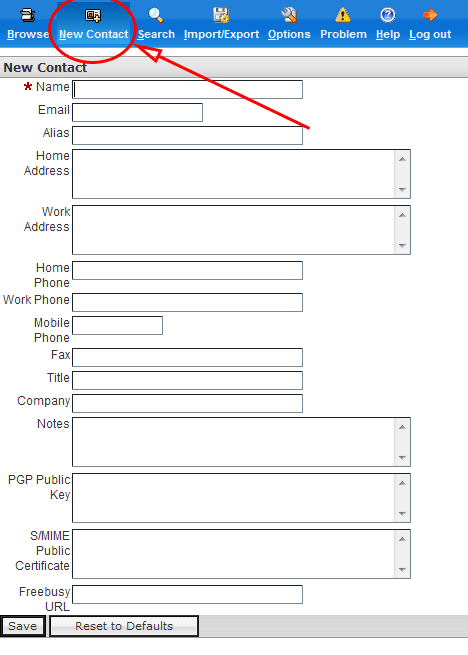
Step 6: Adding a Contact
To Add a contact to your Address Book, click on the New Contact Icon in the top bar of icons, as indicated below:
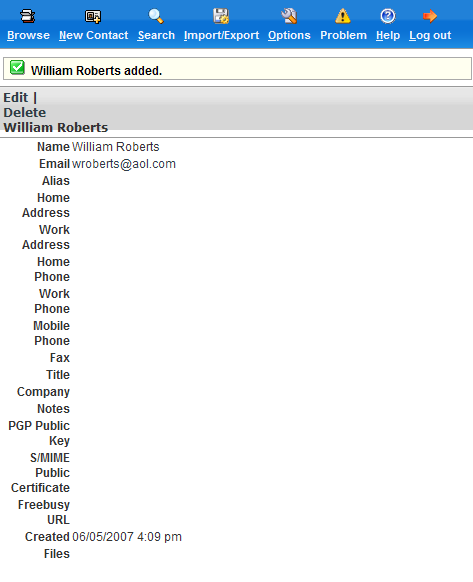
Type the information of your contact in the appropriate fields. In this example, we are adding William Roberts, whose email address is wroberts@aol.com.
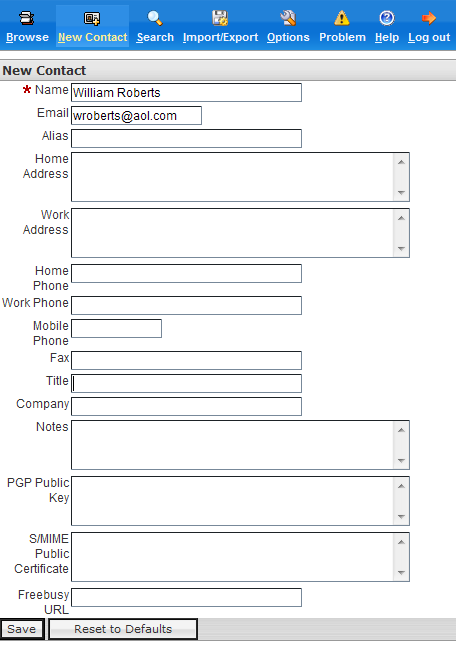
Note: We did not fill out other details about our contact in our example, but you can add all the details you want, for example, the street address, the phone number, the company they work for, etc.
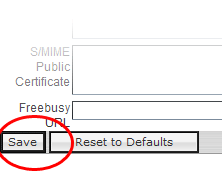
When you are done entering the information about your contact, simply click on the Save button at the bottom of the page:
This will bring up a page that confirms the addition of the new contact:
Step 7: Browsing your Address Book
To see the list of contacts in your address book, click on the Browse icon in the top row of icons, as circled below:
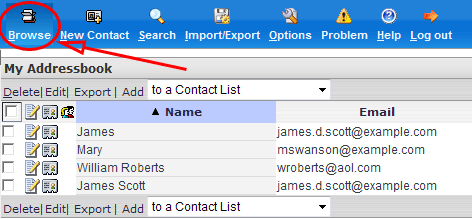
This will display the list of the contacts you have gathered in your address book.
Step 8: Sending an email to one of your contacts
To write to one of the contacts listed in your address book, simply click on their email address. This will open the "compose" window automatically, ready to send an email to the contact you selected.
In this example, we are clicking on Mary's email address to send her an email:
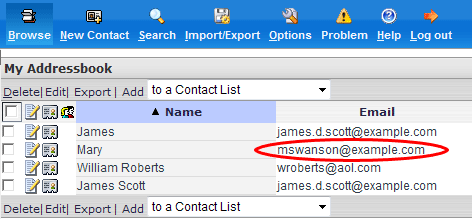
IMPORTANT NOTE: DO NOT click on the name of the contact if you want to send them an email. Clicking on the name will let you Edit the contact information (more on this below).
ALTERNATE METHOD
You don't need to open the address book section to send a message to a contact who's in your address book. You can simply click on the Compose button (click here for more information about how to send a message with webmail), and click on the Address Book icon:
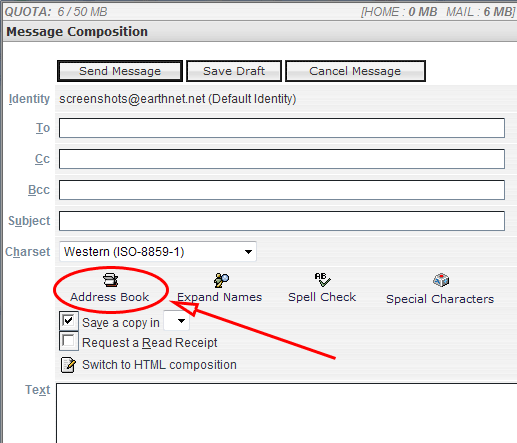
This will open a pop-up window, letting choose which contacts you wish to send the message to. Simply select the contact from the left column, then click the "To" button to add them to your selected recipients. Repeat the procedure to send to multiple recipients.
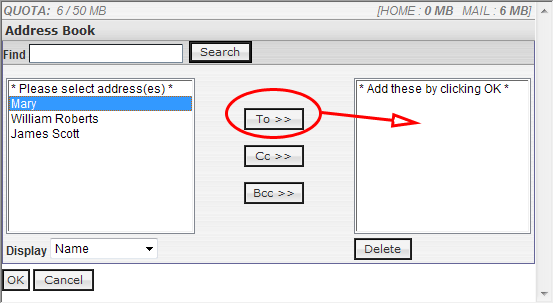
Once you have selected all the recipients you wanted, click the OK button in the lower left-hand corner.
Step 9: Editing a Contact
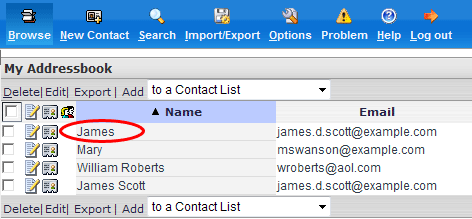
If one of your contact changes their email address, you will want to update their email address inside your address book. To do so, click on the Browse button to view your contact listed, then click on their NAME, NOT on their email address.
In our example, we clicked on the name James:
This will bring up the Edit Entry window. Here, we see James' contact information.
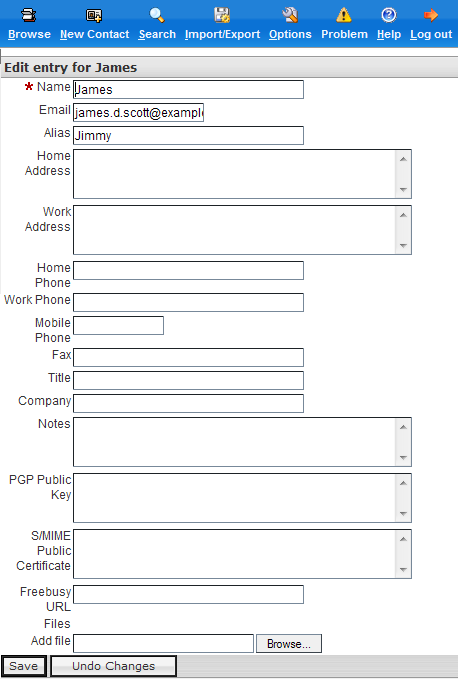
Make your change, then click the Save button in the lower left-hand corner.
You will have a confirmation message:
Step 10: Deleting a Contact
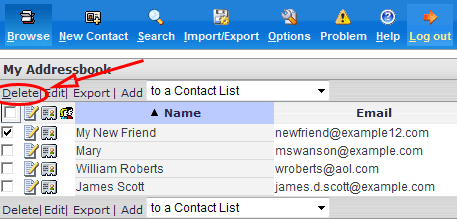
If you need to remove a contact from your address book, first bring up the contacts list, by clicking the browse button as shown in Step 7.
Check the box in front of the contact you wish to delete, then click the Delete link as indicated below. In our example, we are removing the contact called "My New Friend":
After clicking the Delete link, you will see a confirmation message:
Step 11: Searching for a Contact
If you have a lot of contacts in your address book, you may find it handy to use the search feature to find the contact you're looking for, rather than browsing your long list of contacts.
To search for a contact, click on the Search icon in the top row of icons (circle #1):
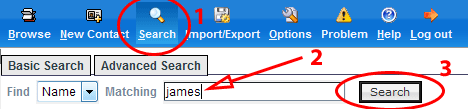
Then type the name of your contact in the box called Matching (arrow #2) and finally click the Search button (circle #3)
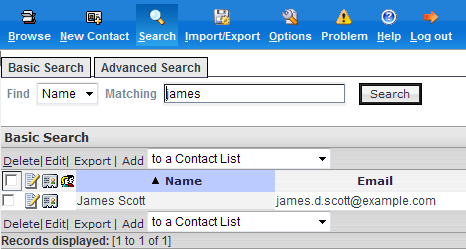
You will have the results of your search in the next screen:
Congratulations! You know now how to use your address book!
For more information about webmail, check our webmail advanced tips page.