How to use the Earthnet's Web Mail (webmail.earthnet.net)?
This guide will tell you how to use Webmail with your new Earthnet service. It covers the basics of sending and receiving email, and attaching files.
Quick links:
- Open Webmail
- Log on to Webmail
- View your inbox
- Read a message
- Reply to a message or compose a new message
- Attach a document
- Open or save attachments
- Delete unwanted messages
- Log out
Step 1: Start Your Web Browser
Start your web browser, the way you normally do when you are going to browse the web to visit a website. If you have to dial up in order to connect, do that now. In the following example, we are using Internet Explorer on a PC. Most other browsers will be very similar.
Step 2: Go To the Webmail web page:webmail.earthnet.net
Near the top of the window, at the Address bar, type in webmail.earthnet.net and hit enter. This will bring up the webmail log-in screen, shown in step 3.
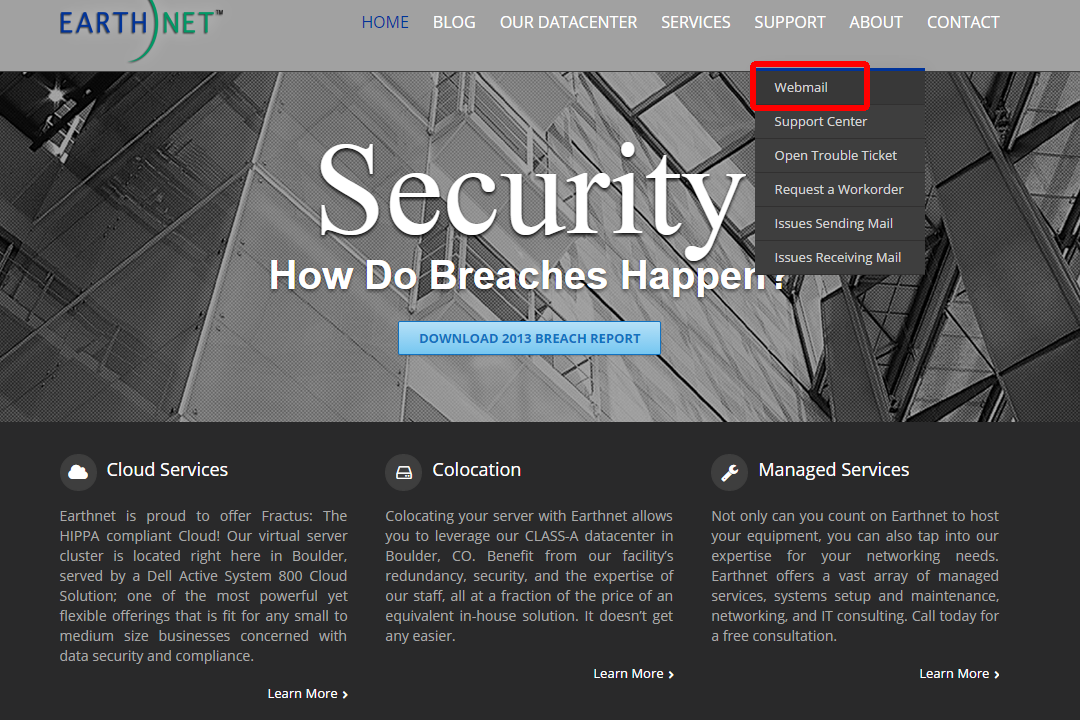
Alternately, you can go to our website, www.earthnet.net , then click on the Support Option:
Step 3: Log In
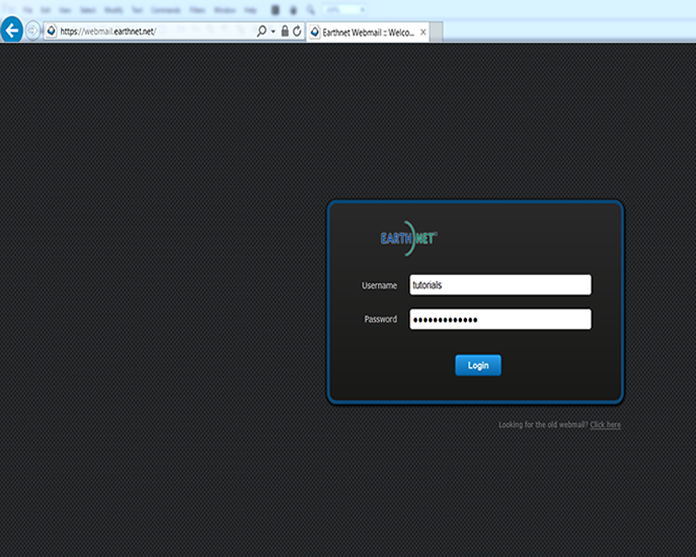
A page will load, titled Welcome to Webmail. Type in your username and password, then click the Log in button.
Step 4: View your Inbox
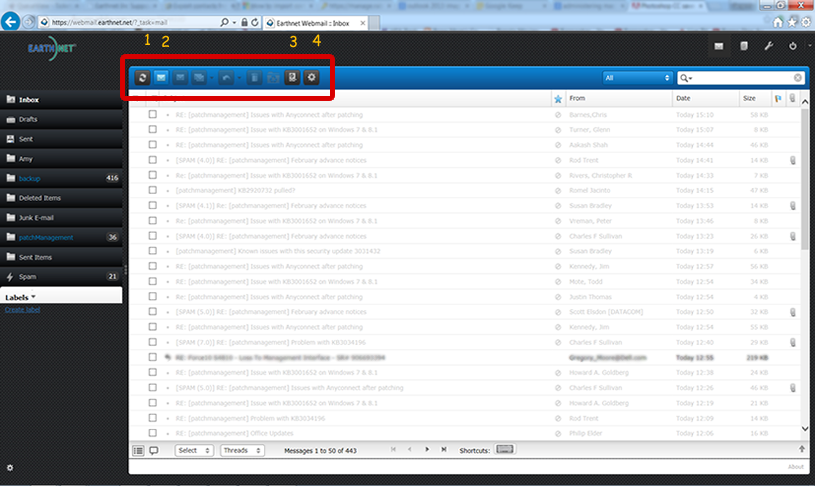
After you log in, your screen will look similar to the picture below. You will have a list of all of your messages. It will show the Date when the message was received, who it is From, the Subject of the message, and the Size of the message. There is a row of icons along the top as shown in the image below
1. Check for New Messages .
2. Compose a New Message .
3. Mark this Message as (Read/UnRead/Flagged/UnFlagged) .
4. More Actions .
Step 5: Read a Message
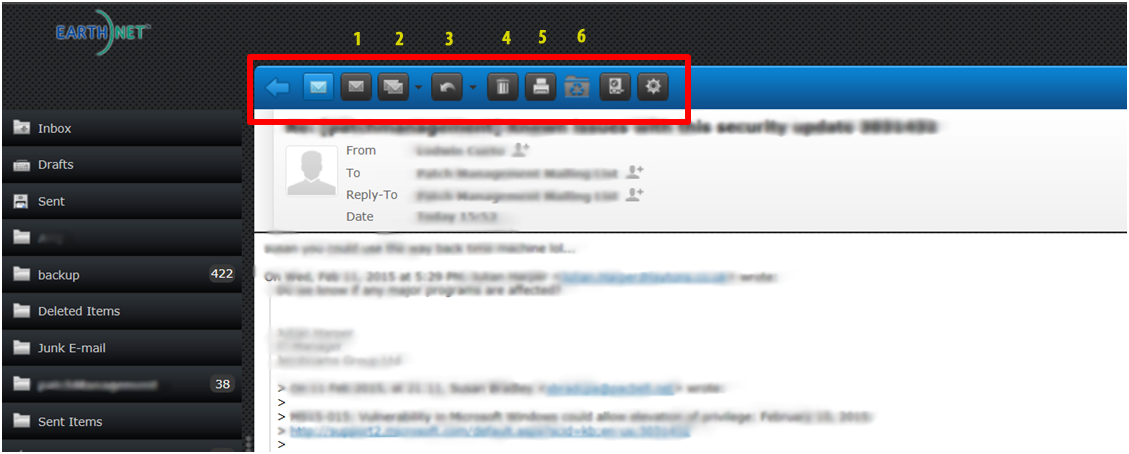
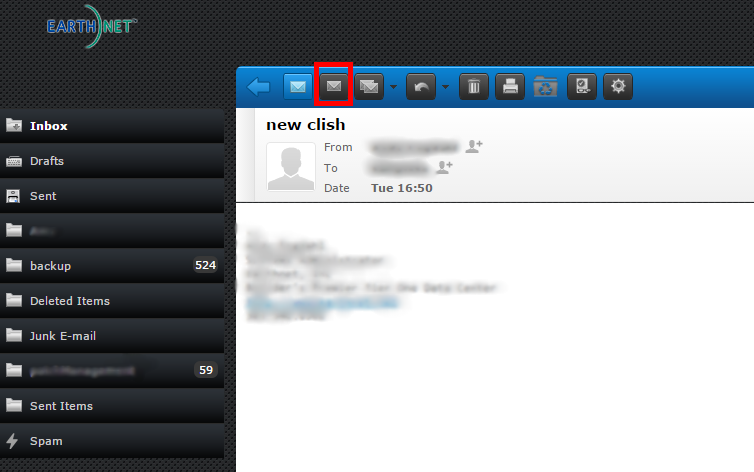
Double Click on one of the messages, You will find more action icons along the top as shown in the image below
Now, you will see the message. From here, you can delete, forward, reply, or print the message. Notice the red rectangle in the example below, it is showing these links.
1. Reply to this Message .
2. Reply All to this Message .
3. Forward this Message.
4. Move Message To Trash .
5. Print this Message .
6. Mark this Message as Junk .
Step 6: Reply to a message or Compose a new message
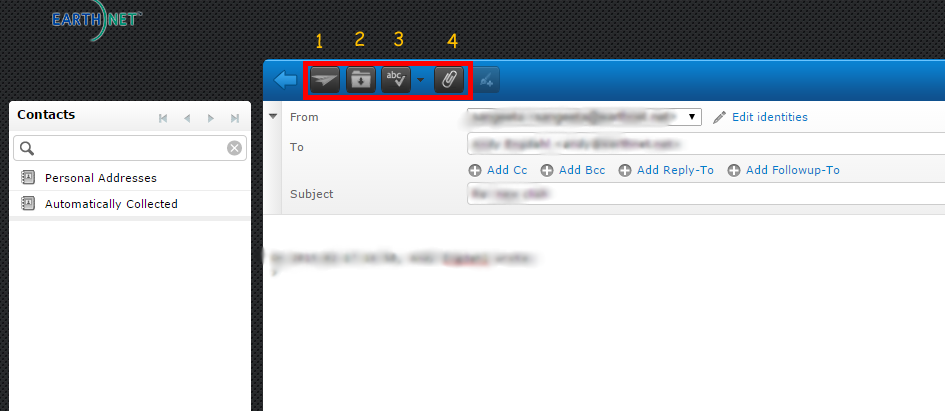
If you click the Reply icon at the previous step, or if you click the Compose icon at the top of any screen, you will get the following page:
In the Reply window you will find icons to Send, Save as Draft, Spelling Check or Attach a file to the reply message. The Red rectangle in the image below highlighting the numbers for each option:
1. Send Message
2. Save As Draft
3. Check Spelling
4. Attach a file
Type in the address of the person you want to write to in the TO field. If you were simply replying to a message, that address will already be inserted in the TO field.
Type the text of your message in the TEXT box.
When you're done typing your message, click on the Send Message button.
Step 7: Attach a document
If you wish to send a document along with your email, you will need to follow this procedure to attach the document:
When you're in the Compose (or Reply) window, fill out the TO field, type your text, and then click on the Attach a file icon on the top or the blue Attach a file button to your right. :
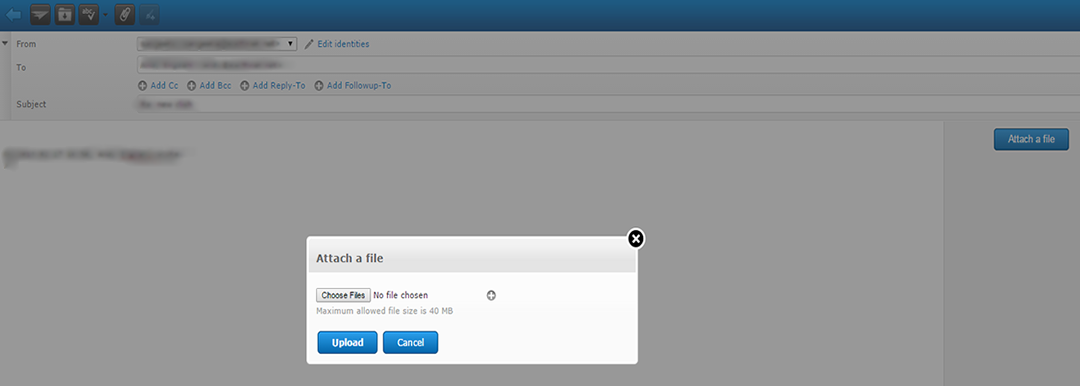
Click the Choose File button as shown in the image above. This will open a dialog box that will let you navigate to the document you want to attach (it will most likely be somewhere in your hard drive). Once you have located the document(s) you wish to attach, click on the 'Open' button. This will close the dialog box and bring you back to the composition window. You will see the name and the path of the file you are about to attach in the box:'.
DO NOT FORGET THIS STEP: CLICK ON THE UPLOAD BUTTON to actually attach the document to your message. If you do not click the update button, the file will not be attached.
The final step is to click on the Send Message button on top.
Step 8: Open or save attachment(s)
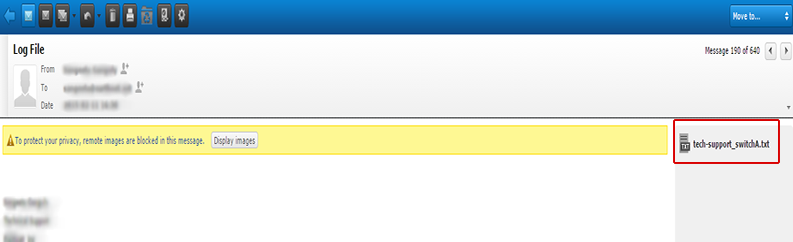
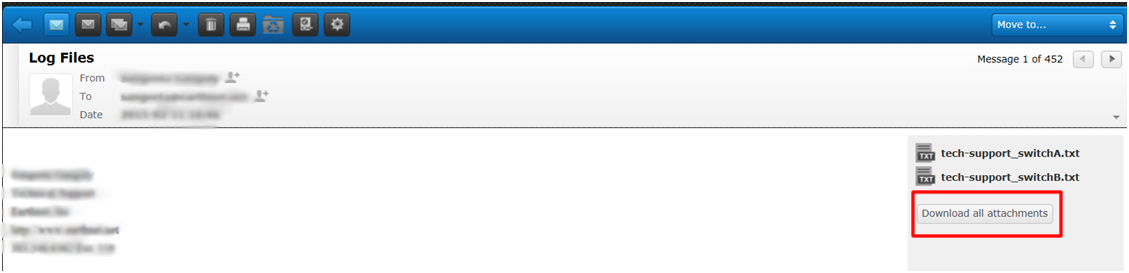
The example below shows a message that contains an attachment.
To VIEW the attachment, simply click on the name of the attachment. In our example below, just click on the filename to your right to open the file:
Once you click on the name of the attachment you will notice a window at the bottom of the screen like the image below. Select Open or Save ( Save/Save As/ Save and Open) to view or save the file.

If you receive an email that contains more than one single attachment, you can:
- open each document individually by clicking on their respective name,
- Save them separately by clicking on the Save option
- or download all the documents at once in one 'zip' file (compressed archive file) by clicking on the link 'Download All Attachments (in .zip file):
To SAVE the zipped attachment, Click on Save as shown in the image below

Note: to open a .zip file, you need either Windows 7 or 8.1, or a dedicated program that lets you open archived documents, such as 7Zip, WinZip, WinRAR, Stuffit Expander, Aladin Expander, etc.
Step 9: Delete unwanted emails
If you want to delete messages from your mailbox, from webmail, you will need to follow this procedure:
First, put a check mark if front of each message that you want to delete, then click the Send to Trash icon (square box on top in red on the screenshot):
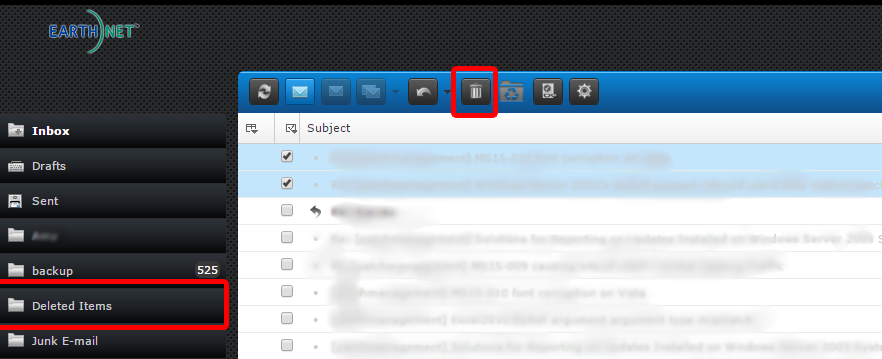
Simply clicking that delete link will not completely remove the message, it will send the messgaes to Deleted Items folder (Rectangular box in red on the left of the screenshot)
The last step to completely get rid of those messages from Deleted Items folder. To do so, click on the Deleted Items folder on your left highlighted with a red rectangular box.
Select the messages you want to delete permanently from your mailbox and click on the Delete icon on top.
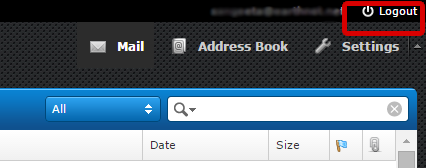
Step 10: Log Out
When you are done reading and sending messages, you should Log Out. To do this, click the Log Out icon, in the upper right-hand corner of the screen.
Congratulations!
You now know how to use Webmail to send and receive email.
For more information about webmail, check our webmail advanced tips page.