How to Setup your E-mail Account - Outlook Express
This document will show you how to configure Outlook Express to be able to send and receive your e-mail.
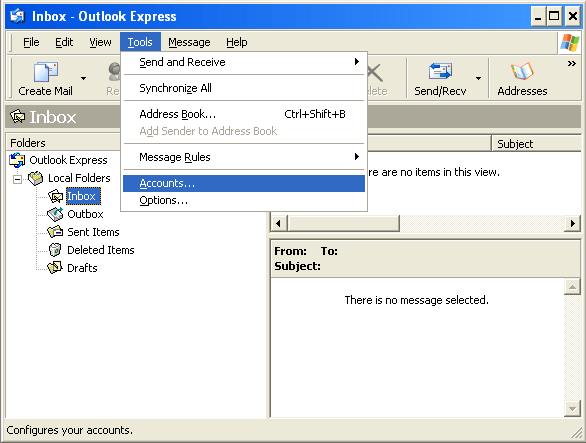
1 - Open Outlook Express, go to the Tools menu and choose Accounts:
Note: if you're setting up Outlook Express for the first time, please go directly to step 3.
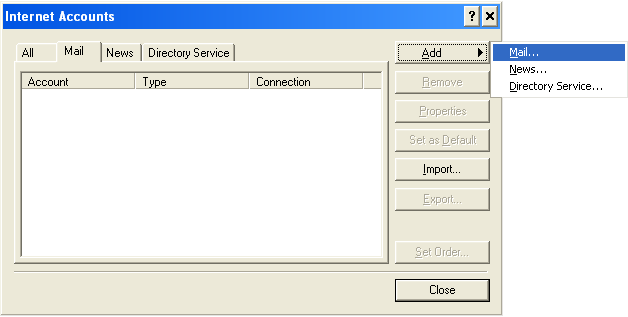
2 - Make sure you are on the second tab called Mail, click on the Add button in the upper right-hand corner, and select Mail:
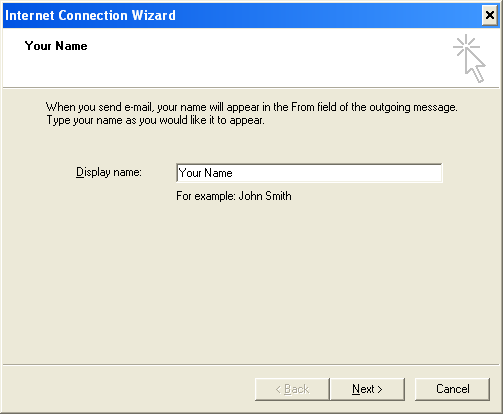
3 - The Internet Connection Wizard window will pop-up. Please enter your display name, which is the name that will appear in the From field when you send e-mail. You can then click Next:
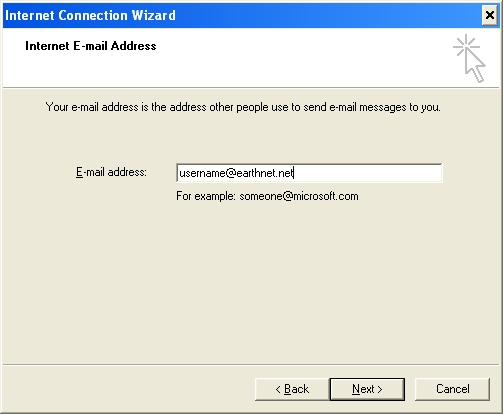
4 - Enter your e-mail address, then click Next:
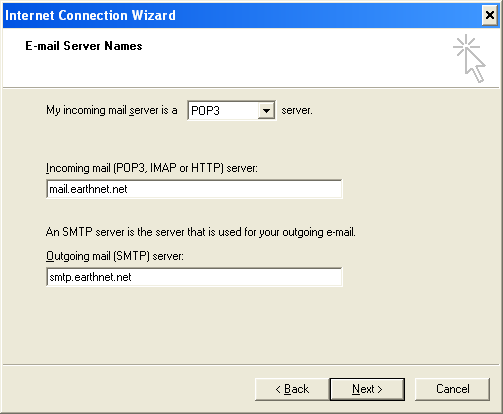
5 - Choose POP3 from the drop-down box (unless you prefer to use IMAP), then enter the following information:
Incoming mail (POP3, IMAP or HTTP) server: mail.earthnet.net
Outgoing mail (SMTP) server: smtp.earthnet.net
Once this information is entered correctly (make sure you didn't type "smpt" instead of smtp for example), you can click Next.
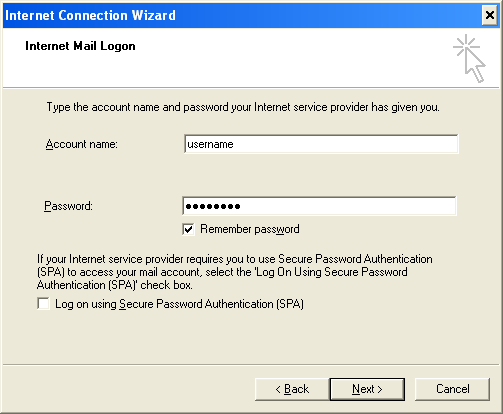
6 - Enter your username in the Account name box (your username is usually the first part of your e-mail address at earthnet.net, so if your e-mail address is johndoe@earthnet.net, your username should be johndoe).
Type in your password in the next box, and make sure you do not have the Caps Lock key turned on, since your password is case sensitive (and so is your username).
Make sure Remember password is checked.
Do NOT check Log on using Secure Password Authentication (SPA).
You can now click Next.
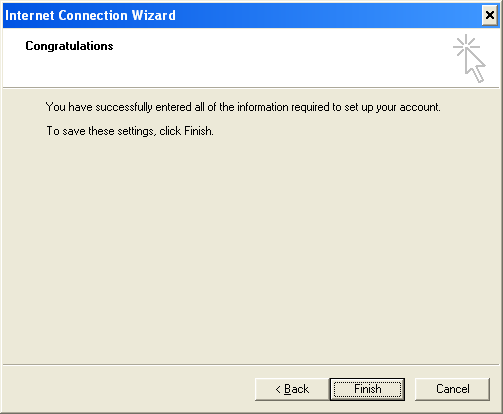
7 - The Congratulations screen will appear. Click Finish.
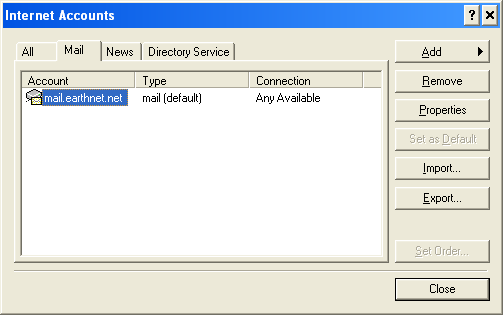
8 - You should now be back on the Internet Accounts window, and see an account called mail.earthnet.net. Please double-click on that name (mail.earthnet.net).
9 - You should now see the following dialog box:
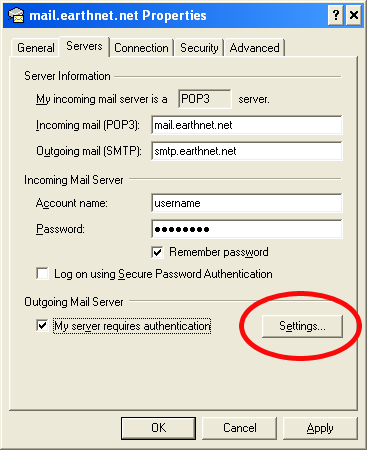
Go to the second tab called Servers.
In the lower section, you should see a checkbox called My server requires authentication. Please CHECK that box.
Now, click on the Settings button next to it.
10 - A dialog box like this one should have popped up:
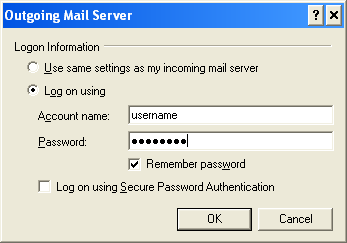
- Choose the second radio button called Log on using,
- enter your username in the Account name box,
- enter your password in the Password box,
- make sure Remember password is checked,
- do NOT check the last box called Log on using Secure Password Authentication (SPA).
You can now click OK to confirm the changes.
This will close the current dialog box and take you back to the mail.earthnet.net Properties window. Please click OK on that window to close it.
You should now be back on the Internet Accounts window. Click the Close button to finish.
Congratulations, you have finished setting up your email account!